When summer approaches, the majority of the population flock to attractive outdoor spots with the promise of sunshine and a potential tan. Photographers, on the other hand, see the summer months as an ideal shooting opportunity without the threat of interruptions from the harsh weather.
Whilst shooting outdoors should not be limited to the summer, it is important to take into consideration various factors that can truly make your summer shots perfect!
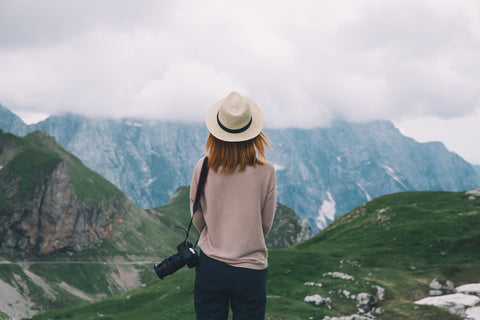
1. Embrace and research new places
We all have our favourite spots to shoot in; whether it’s the trees in our local park, signposts in a particular street, decor in your living space or even bathroom taps in your house, always remember there are always new spots to discover, and sometimes embracing the unknown and going outside can produce surprisingly stunning results! What’s more, there will be no shortage of outdoor events taking place during the summer, which could lead you to that lesser-known place. Some of these are not always well advertised, therefore we recommend doing your own research to find the best locations and events near you!
2. Catch the golden hour
Even if you only have an hour during the day to capture your shot, dedicate at least 15 minutes before sunrise and 15 minutes before sunset to catch the ‘golden hour’. This might mean some patience and dedication but getting up early or staying out later to capture the beautiful sunrise and sunsets is always worth it. During these times, you can shoot breath-taking scenery and landscape without having to avoid the harsh midday sunlight. For night shots, try to capture your shot at dusk when there is still some light in the sky.
3. Chose a wide-angle lens
If you’re heading out into nature to capture landscapes and scenery, pack your wide-angle lens to capture generous amounts of foreground, background and sky simultaneously, which will add depth and strong composition to your finished shots. With wide-angle lenses, you can take in nearly 180 degrees of a scene at once, capturing all of the amazing elements you might have otherwise missed! And whilst we’re on the subject of lenses, purchasing a lens hood will ensure you stop any unwanted light coming into the lens and ruining your shot!
4. Use sunbursts to your advantage
To some photographers, sunbursts can ruin the best of shots, but you can turn this around and use the light to your advantage, especially when shooting people and objects. If you’re comfortable shooting manually, set your aperture to f/8 or higher, or put your camera into ‘Aperture Priority’ to ensure the correct amount of light gets into the camera.
5. Use a polarising filter
If you’re unfamiliar with polarising filters, simply put they are specially adapted glass that, when turned at an angle toward a light source, will reduce glare from reflected surfaces and only let’s light in from certain angles, whilst saturating the blue skies. When using a polarising filter during the summer months, the filter will produce the best results when the lens is pointed 90 degrees away from the sun. If you plan on shooting during the ‘golden hour’, make sure you bring your polariser with you to add depth and background colour to the sky during sunsets and sunrises.
6. Use the sun to your advantage
One of the key rules of photography is to always position yourself with the sun behind you, however, this will mean your subject will be directly facing the sun, causing unsightly facial shadows, not to mention excessive amounts of squinting! Instead, make sure the sun is behind your subject to create a flattering bright halo around the edges of their hair (but make sure the sun is not visible in the shot). If this positioning creates a shadow on your model’s face, this can be counterbalanced with the
Rogue FlashBender Large Reflector, which allows you to shape and control lighting in any way you desire, which in this case would be towards the model’s face, creating a much softer light source.
7. Use natural props
Even if you’re just shooting in your local park, there’s no limit to the number of natural props around you! Take advantage of the flowers, trees, leaves etc. at your disposal; especially if your subject needs something to lean on to avoid the awkwardness of where they should place their hands! If you’re in a spot with plenty of trees around, why not use the branches and leaves to frame your model’s face? There are so many beautiful results you can achieve with natural props!
8. Steer away from the conventional
With the picturesque sunny spots and beautiful weather aplenty, it can be more than tempting to take advantage of the bright, summery shots. The sunshine also creates great potential for those monochrome cityscape images. To see how your shots will look in black and white, we’d recommend shooting RAW and JPEG files simultaneously with your camera’s ‘Picture Control’ set to monochrome, which will allow you to preview how the shot looks in black and white, whilst still leaving enough data for making monochrome conversions post-capture.

Here are just a few of our favourite products we love to use when shooting outdoors!
The ultimate solution for location photographers, the Rogue FlashBender 2 Portable Lighting Kit includes everything you need to unleash your creativity on location! From reflectors to flash grids, this kit contains all the essentials for controlling light when shooting outdoors.

Small enough to fit in your bag, the X-Rite ColorChecker Passport Photo provides effortless colour control, allowing for creative versatility when shooting outdoors.

One of Rotolight’s latest launches, the NEO 2 Explorer Kit delivers power, portability and comfort for photographers on-the-go. Weighing just 6.8kg, the Explorer Kit allows you to take three NEO 2’s wherever you go, allowing you to create your perfect 3 light set up in just minutes!